
F-Body Radiator Installation Procedure
by Austin Wiley
Preface:
The following procedure details how to replace your stock radiator with a new single core aluminum radiator and adding an external engine oil cooler. The construction of the F-Body radiator does not have the proper oil cooler fittings for our application. Although it is possible to run without an engine oil cooler, it is highly recommended to keep the stock oil cooler adapter plate and add a dedicated engine oil cooler due to the heat that our turbo motors produce. (Note that many of us do not use an external oil cooler. If you are not going to use an oil cooler, be sure to remove the oil cooler adapter. Do not try plugging the hose outlets to the external cooler. You absolutely have to remove the adapter or you will burn your engine up from lack of oil in short order-Steve) Furthermore, the two existing oil cooler fittings on the F-Body radiator should only be used to cool the transmission fluid. It is not impossible, however this would require additional fittings and/or hoses to as the stock radiator’s transmission cooler fittings are in a different location than the F-Body radiator. Thus, this procedure will assume that you have already added a dedicated transmission cooler. In conclusion, there are many different options for external coolers as well as mounting them, hoses, etc. However, the focus of this procedure is to provide just one way this can be done and hopefully help save some time and answer some of the numerous questions that this topic brings up in the Turbo Buick community.
Hardware:
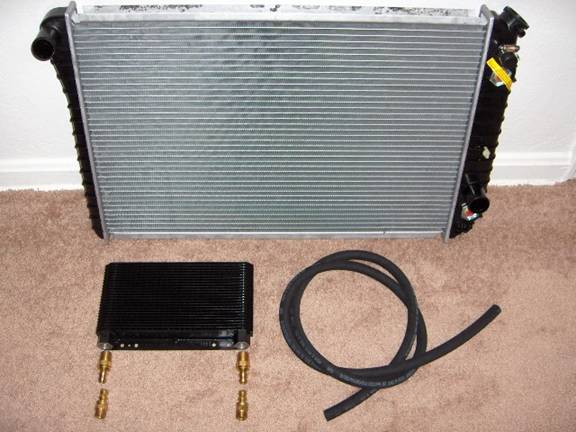
(1)F-Body radiator (Autozone part # 433918) NOTE: There are other manufacturers of this unit such as Modine and part numbers may differ at other vendor locations. When in doubt, ask for a OEM replacement radiator for a ’87-’92 Camaro. www.autozone.com
(1) B&M Engine oil cooler (Summit Racing part # 70273) www.summitracing.com
(2) Oil cooler hose fittings (Aeroquip part # 4738-8-8B)
(2) Oil cooler hose fittings (Aeroquip part #4740-8B)
(1) Oil cooler hose (Aeroquip part # 2556-8) NOTE: A section of at least 6-7 feet is
necessary. Click the following to locate a Aeroquip dealer near you:
http://web.fluidpower.eaton.com/public/distributorlocator/DistributorLocator_Public.aspx
OR go to http://hydraulics.eaton.com/ and click on “Distributor Locator”
Additional and Optional parts: Heavy duty wire ties AND/OR 19 gauge mechanics wire, new radiator cap, quart of oil, quart of transmission fluid, cooling system flush and fill kit, new upper and lower radiator hoses, coolant/distilled water
Tools: Numerous sized SAE and Metric fixed wrenches, Socket wrench, utility knife, flat head screw driver
Procedure:
1) Back flush cooling system so that you end up with a clean system when you fill the cooling system back up after installing the new radiator. A back flush kit is cheap and easy to use. Do it!!!
2) Remove the (5) radiator retainer plate screws (10mm). This is the black plate that holds the top of the radiator down.
3) Remove the (2) nuts (10mm) that hold the two A/C hoses to the clamps on top of the radiator fan. Pull the clamps and hoses away from the fan.
4) Remove the (2) bolts (10mm) that hold the radiator fan to the lower radiator support
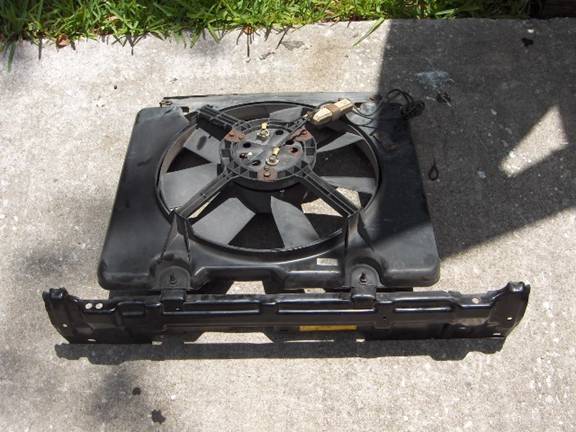
5) Remove the (2) remaining combo bolts (10mm) that hold the top of the radiator fan to the radiator retainer plate. Unplug the radiator fan electrical connector and remove the fan and retainer plate. NOTE: If you are careful of the A/C lines, or better yet, you have deleted the A/C system altogether, the retainer plate and fan can be removed as one unit as such:
6) Get underneath the front of the car and remove the lower portion of the radiator box. This is the flexible black material that is affixed with several plastic “keepers” Often these break upon removal, but they can be replaced later. Or you can choose not to replace the lower radiator box since the new system cools so well. It’s purpose is to force oncoming air through the condenser and through to the radiator.
7) While still under the vehicle, remove the grill by removing the two springs and the (3) 10mm bolts that hold the grill in place .
8) If they haven’t been removed already, remove the X-shaped bars that cross in front of the A/C condenser (4 x 10 mm bolts). NOTE: These bars aren’t really necessary, so they will be removed permanently in this particular application.
9) Detach the transmission fluid lines near the upper radiator hose leaving the proper connectors in place to reattach your external transmission cooler.
10) Detach the oil cooler lines by detaching the ¾” fittings from the old radiator, and using a 20mm wrench and a 15/16 wrench, detach the other end of the lines from the oil cooler adapter plate, leaving the adapters at the oil cooler plate in place.
11) Detach the upper and lower radiator hoses and move them out of the way. Detach the overflow reservoir hose and move it out of the way.
12) Remove the old radiator.
13) Take the new external oil cooler and thread the Aeroquip fittings (the ones with the longer threads) onto the cooler and tighten them down real good. NOTE: These fittings must be very tight or they WILL leak. Just be careful not to over tighten. We will check for leaks later just to be sure.
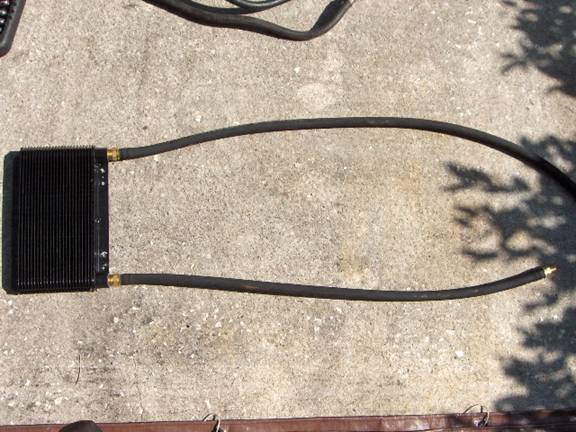
14) Cut two sections of the new Aeroquip hose making each length approximately 3 to 3 ½ feet in length and press them onto the fittings at the external cooler.
15) Press the remaining two Aeroquip fittings (the ones with the shorter threads) onto the other ends of the hose. NOTE: It may be helpful to make one length of hose slightly longer to easily reach the furthest fitting on the oil cooler adapter plate, although it is not necessary. It should look similar to this:
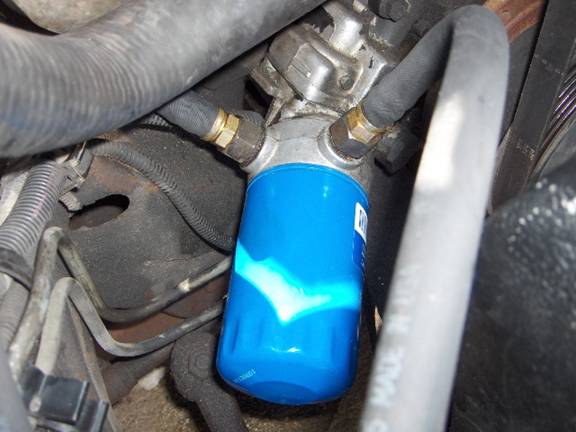
16) From the front of the vehicle, take the new oil cooler assembly and thread the hoses around the side of the A/C condenser and thread the fittings onto the oil cooler plate using a 19mm wrench. The lower hose from the external cooler goes to the passenger side fitting on the oil cooler plate, whereas the upper external cooler hose goes to the driver’s side fitting. Also make sure that there are no kinks or binds in the hoses and that all bends have a smooth radius. NOTE: As mentioned before, these fittings need to be clean and very tight or they WILL leak.
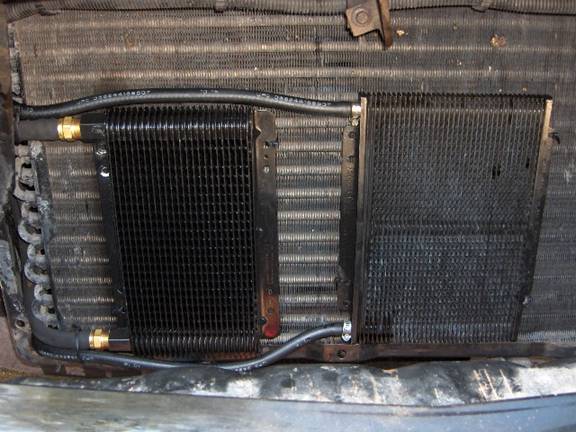
17) Mount the cooler to the A/C condenser using heavy duty wire ties and/or 19 gauge mechanics wire.
18) Reinstall external transmission cooler and mount according to taste. Here’s an example:
19) Install new radiator and attach upper and lower radiator hoses. Attach overflow reservoir hose.
20) Reinstall radiator fan and plug in its electrical connector making sure no wires are in the way of the rotating fan. Reinstall the radiator retainer plate, A/C lines, and grill.
21) Fill radiator with your choice of fluid(s).
22) Disconnect ECM connector and turn engine over for several seconds to allow oil to fill the new hoses and cooler. Reconnect ECM connector and start the engine. While the engine is running, use this opportunity to check for leaks while filling the cooling system to its proper level. After a couple of minutes, shut the motor down and check the engine oil level. More than likely, you will need to add from ½ quart to 3/4 quart to bring the level back up due to the increased capacity and the oil that remained in the old radiator. Restart the motor and check tranny fluid, water level, and look for leaks.
23) Over the next few days, frequently check for leaks and fluid levels.
NOTE: The stock radiator weighs in at 20.8 lbs. The F-Body radiator weighs in at 11.0 lbs. The external oil cooler assembly weighs 1.6 lbs. The X-shaped bars in front of the condenser (now removed) weigh 2.0 lbs. This accounts for a weight loss of about 10.2 lbs at the front end