
Thermostat/Water Outlet
When these cars were new, they came with a 180 deg thermostat which was a smaller diameter than most other thermostats. The correct thermostat for the turbo Buick is 44 mm in diameter whereas the naturally aspirated cars use a 54mm diameter unit. Often when you buy a new one for our cars, it will be 54mm and it will not fit. Some actually go to the effort to trim the outside diameter down to the right size but this is a pain in the neck. The naturally aspirated cars came with a 195 deg thermostat. The engineers used the lower temperature thermostat in order to try to minimize detonation. The clinger in this deal was that the factory chip in the ecm did not turn the low speed fan on until about 205 degs so once the car was warmed up, the 180 deg thermostat really meant nothing. In those days, we used to put a manual switch in the loop to ground the fan relay circuit and turn it on to try to keep the engine cooler. I suspect the fan was turned on at a high temp in order to improve emissions as delivered.
One of the early tricks was to remove the 180 deg unit and install a 160 deg thermostat to further improve detonation resistance. Some wondered if this was warm enough to minimize wear. These 160 deg units were hard to find then, and today, they can often be found from certain vendors. Look for a Duralast 3846 from Autozone or look on Rock Auto and find one that is 44mm. They should have several brands in that size. It fits. After 30 plus years, I have come to the conclusion that going to the 160 deg thermostat does not buy a real performance gain but it will make you wish you had a 180 in the wintertime. Remember, the thermostat sets the minimum temperature that the car will operate at. It does not determine the actual temperature the car will run when warmed up. If you live in a cold climate, then it may run under 180 warmed up but I suspect most of us will still see 180, or more, on the gauge when driving around normally. I recommend 180 deg thermostats these days as I believe that any improvment in performance on a 160 deg unit is more folk lore than fact on street cars and it will produce better heating in the winter, a little better gas mileage, and, perhaps, less wear and tear on the engine in the winter.
Many drill a small hole through the edge of the thermostat to bleed off air that might be trapped in the engine. Make sure the hole is not shrouded when the thermostat is installed so it will allow air to pass thru...install the thermostat so the hole is at the top where any air pockets might be.
When the first performance chips came on the market, they were pretty crude, but, most turned the fan on low speed at 160 degs to match the thermostat we installed. Today, I see most turn the fan on around 168 degs. Whether this is to improve the performance of the heater in colder weather, further minimize wear, or merely because reality says many cars will not run that cold in hot weather...or all of the above, I am not sure.
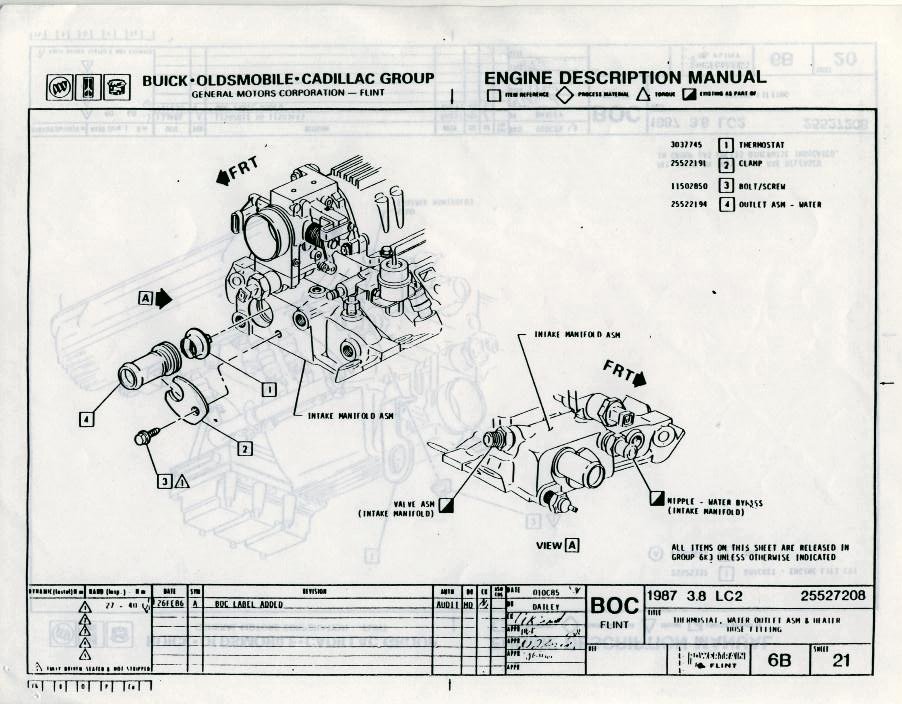
It is not a bad idea to change the thermostat every few years before it starts to stick and cause the engine to overheat. In theory, this is a very simple operation. The thermostat is located in the front edge of the intake manifold at the end of the upper radiator hose behind the water outlet.
Here is a drawing from the engine assembly manual showing the location. As you can see, the thermostat sticks into the opening of the intake and the water outlet then is pressed into the intake and retained by the clamp. The outlet has a big rubber o-ring at the end that seals the unit and prevents leaks.
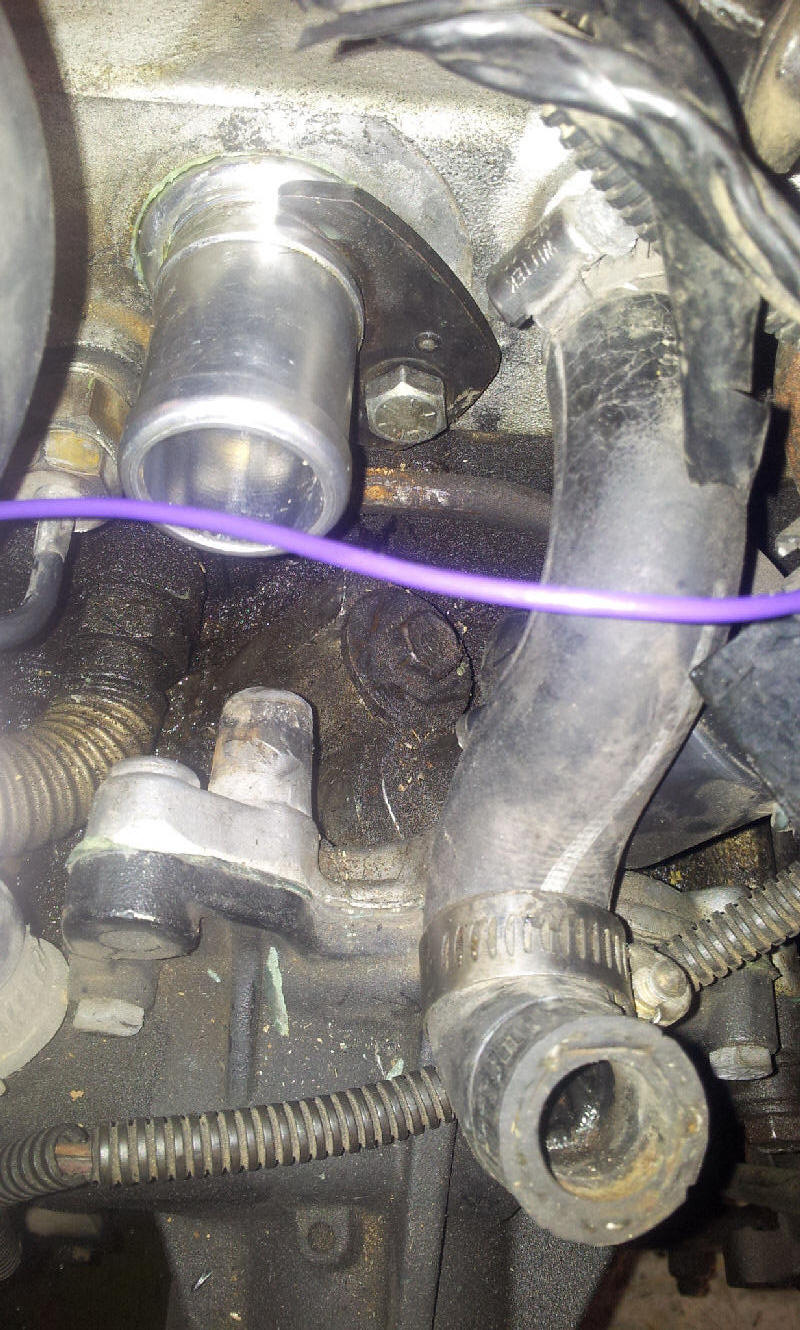
Here is a picture of a new outlet installed over the new thermostat and the hose is ready to reinstall. Note that I had to remove the turbo inlet pipe and the up pipe to the throttlebody to get access to the outlet. I also had to remove the S hose (bypass hose) in order to get to the bolt in the retaining clamp. I strongly suggest that this is a good time to replace the S hose while it is readily accessible. Might as well replace the upper radiator hose as well. Took the picture before I cleaned up all the oil that had accumulated there. Still trying to figure out where it came from.
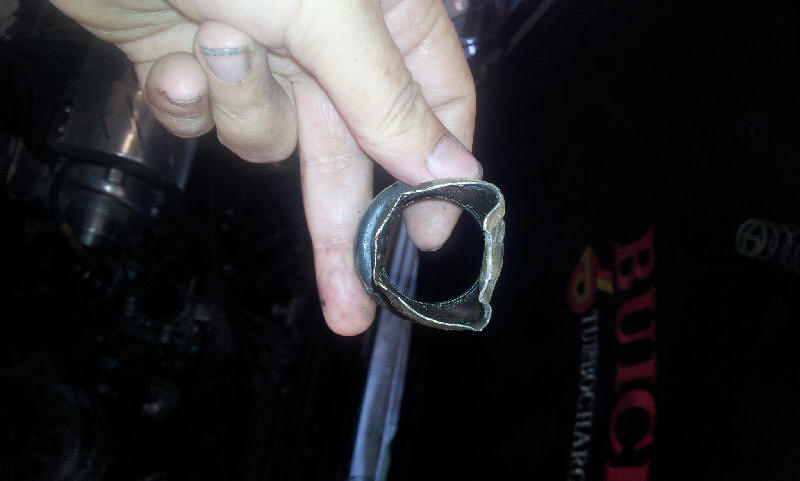
Now, that was really easy, huh? Actually, it can be a major pain in the rear because the water outlet can be next to impossible to remove after two or three years. Knowing this, I bought two outlets along with two thermostats (I have two cars) before I started this project. Below is the picture of the one I pulled out. After a lot of wiggling and no progress, I put the pliers down and got the vise grips out. Even then it was not easy. Be prepared! For one that has not been installed too long, try leaving the radiator hose attached and use it for some added leverage when wiggling. That often works very well.
I managed to get the one out of the other car without destroying it but I had it out two years ago. I always smear a coat of grease over the rubber o-ring before pushing the outlet back in the intake and I clean out the intake opening to remove anything that might nick the o-ring.